


The strategic process behind CGI
LinkedIn
Introduction
Adopting CGI (Computer-Generated Imagery) is a strategic leap that offers incomparable visual quality and superior cost efficiency compared to traditional photography. However, this change involves not only technology but also a distinct project management methodology. A successful CGI project does not solely depend on the technical skill of the 3D artist, but on impeccable planning, communication, and supervision.
Many projects fail not because of the final render, but because of an ambiguous briefing or the lack of a structured approval workflow. Ignoring these management steps results in endless revisions and blown budgets.
In this comprehensive guide, we will break down the management of a CGI project into 7 essential phases, focusing on the decisions you, as a brand leader or project manager, must make. You will learn how to elaborate the perfect briefing, establish critical approval milestones, and ensure that the digital assets generated serve you in the long term. Prepare to master CGI project management and secure results that drive your brand strategy.
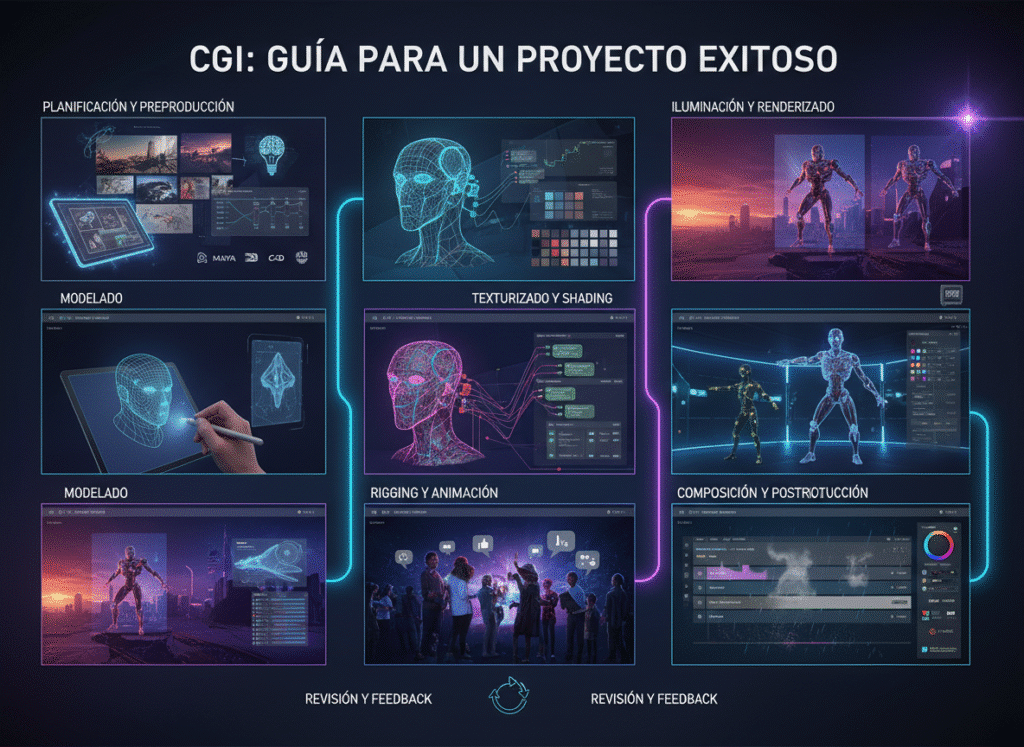
The CGI Process: 7 Critical Management Phases
The key to success in CGI is treating every project as an asset investment, not just a simple photoshoot.
Phase 1: Strategic Briefing and Asset Definition (Kick-Off)
This is the planning phase where the «why» and «how» of the project are defined.
- Requirement Definition: Specify the final use (e-commerce, print advertising, AR). This defines the level of detail, resolution, and complexity of the 3D model.
- Data Gathering: Provide the 3D team with all CAD blueprints, color specifications (Pantone codes), and texture samples. The precision of the input is the key to the precision of the output.
- Deliverable Establishment: Determine the exact number of renders (angles), the type of lighting, and the background (white background, photorealistic environment, fantasy).
Phase 2: Base Model Approval (Wireframe & Geometry)
Before investing time in textures and lights, the manager must verify the shape and scale of the digital asset.
- Critical Milestone: The 3D team delivers a «grey» render or a wireframe of the model.
- Geometry Validation: The client verifies that the proportions, curves, and dimensions of the digital model exactly match the physical product or prototype.
- Decision: No project should proceed without formal approval of the geometry. Correcting the shape at this stage is fast; doing it after texturing is costly.
Phase 3: Materials and Textures Approval
This guarantees that the final finish is authentic.
- Material Testing: The 3D team presents close-up renders that show how light interacts with the textures (e.g., the sheen of chrome, the roughness of leather).
- Photorealistic Adjustment: The manager must compare the texture render with the physical product sample. If the finish is matte or semi-glossy, it must be reflected with total precision.
- Brand Consistency: Final colors are approved using the Pantone or HEX references established in Phase 1.
Phase 4: Composition, Lighting, and Scene Approval
This phase is the virtual art direction; the «look and feel» of the render is defined.
- Composition Proposal: The team presents sketches or low-resolution renders with the camera and the lighting setup proposed for each shot.
- Narrative Validation: The brand manager approves the composition that best communicates the product’s message. Is the light soft and luxurious or harsh and dramatic?
- Set Dressing Approval: If background elements are added (e.g., a plant or a wooden background), they are approved to ensure they reinforce the main product and do not distract from it.
Phase 5: High-Resolution Rendering and Pre-Delivery
Once all aspects have been approved in low resolution, the final render is executed.
- Final Render Execution: The 3D team generates the image or animation at the highest resolution and with the maximum required sampling quality.
- Render Passes Generation: It is ensured that the light and shadow layers (passes) are generated for flexibility in post-production.
- Quality Control (QC): A comprehensive review is conducted to detect any digital «noise,» artifacts, or errors in reflections before sending it to the client.
Phase 6: Post-Production, Final Retouching, and Final Approval
The human touch that refines digital perfection.
- Color and Contrast Adjustment: The post-producer uses the render passes to make subtle colorimetry and contrast adjustments, giving it the final punch.
- Version Control: The brand gives the final approval. It is crucial that any feedback at this stage is minimal, as structural changes should have been resolved in Phases 2-4.
- Final Decision: The image is approved as ready for distribution in digital or print channels.
Phase 7: Delivery and Digital Asset Library Creation (Long-Term Investment)
Success does not end with the final image, but with the capitalization of the 3D asset.
- Complete Delivery: Delivery of the final image and, most importantly, the 3D source files (the digital asset).
- Archiving and Cataloging: The 3D model is cataloged and stored in the brand’s Digital Asset Library.
- Long-Term Benefit: This library allows for re-rendering the same product for future campaigns (e.g., changing the background or lighting in minutes) or using the model for Augmented Reality experiences without additional modeling costs. This maximizes the ROI of the CGI project.